Four Ways to Teach DNA Structure with Visible Biology
Posted on 4/1/22 by Sarah Boudreau
DNA can be hard to understand because it’s difficult to visualize, but it’s important for students to understand the structure of DNA so they have a foundation to learn more complex concepts.
Never fear, Visible Biology is here!
You might have heard about how Visible Biology can liven up your classroom and how learning in 3D can help students become more engaged and retain more information. Today on the blog, we’ll dive into four ways you can use Visible Biology to teach DNA structure.
How to use this lesson content
Visible Biology is included as part of Courseware, Visible Body's teaching and learning platform. All relevant content is already loaded into Courseware and ready to go!
If you don’t have access to Courseware yet, reach out to our team for a free instructor trial!
If you already have Courseware, follow these steps to add this folder to your course:
- Click on this link to add the lesson plan material to your Courseware account
- In this new course, click on the Bulk Editing tool, select the relevant folder(s) and click Copy. Choose the destination course and folder and copy.
- Navigate to your existing course, where you will find the content you copied. Use the bulk editing tool to edit release and due dates and publish. If you have Canvas deep integration set up, deploy to Canvas.
Once this lesson content is copied to your account, you can customize it to fit your class’s unique needs!
1. Be a DNA Tour Guide
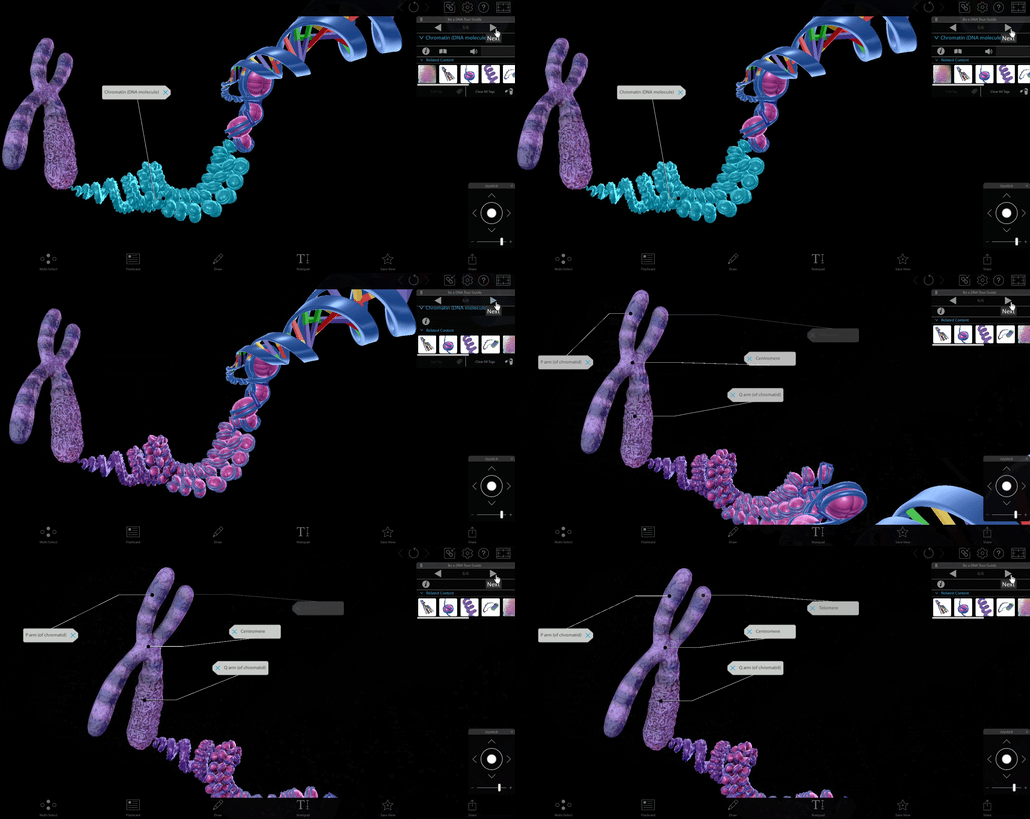
You can use Visible Biology’s Tours feature to show students the internal structure of DNA and how DNA is stored in chromosomes. Learning about DNA is tied to learning about its shapes and how they fit into each other, so it’s helpful for students to be able to visualize this in 3D instead of relying on static images.
Before class, pull up the models and save the views you would like to use in your lecture, then create a Tour using these views.
Here is the URL to a sample tour to show your students an overview of DNA structure. It’s made up of six views that allow you to zoom in on different structures. To access the tour, click on the "Share Link" icon on the bottom right of your Visible Biology app and paste in the URL. Once you've accessed the tour, you can save it to your library by clicking "Save View" and then "Save Tour."
View 1: Sugar backbone and base pairs. Start with the DNA strand, explaining to students that DNA is made up of two strands that twist into the iconic double helix shape. Point out the base pairs in the center of the structure. Explain that hundreds of thousands to millions of these base pairs make up a single molecule of DNA.
View 2: Double helix. In eukaryotic cells, the double helix of DNA coils tightly and wraps around histone proteins. Play the animated model and as you move it around, explain that DNA wraps two and a half times around a cluster of eight histone proteins to make a nucleosome.
View 3: Nucleosome coiling. Pause the animation and ask students to identify the structures they just saw in the previous animations. They should identify the nucleosome, made up of histones and DNA.
View 4: Supercoiling. Illustrate how the coil made by the nucleosomes, connected like beads on a string, coils up again. Ask students why coiling is beneficial.
View 5: Chromatin. Manipulate the model to show how coiling means there’s much more information in a smaller space. Show them the scale of the DNA base pairs versus the chromosome as a whole.

Tours GIF from Visible Biology.
View 6: Parts of the chromosome. Walk students through the different parts of the chromosome: the Q arm and P arm joined together by the centromere with telomeres on the ends.
By the end of this lecture, students will not only have an overview of the structure of DNA—they will have a deeper understanding of its spatial context.
2. Design Scavenger Hunts
To show students the differences between prokaryotic and eukaryotic chromosomes, have them navigate the prokaryotic and eukaryotic models independently. Ask students to create Venn diagrams that list the similarities and differences between the models.
When students are done, go through the differences and similarities between the two, highlighting what students might have missed from a quick look-over. Have them check off the ones they got correct and add in the points they did not write down.
Students might notice that the eukaryotic DNA coils into chromatin and eventually makes up a chromosome. Point out that eukaryotic cells tend to hold more DNA than prokaryotic cells and that chromatin is made up of DNA and histones and is contained within the nucleus. The DNA and histones coil into nucleosomes, the nucleosomes coil into solenoid fibers, and solenoid fibers coil again when mitosis occurs.
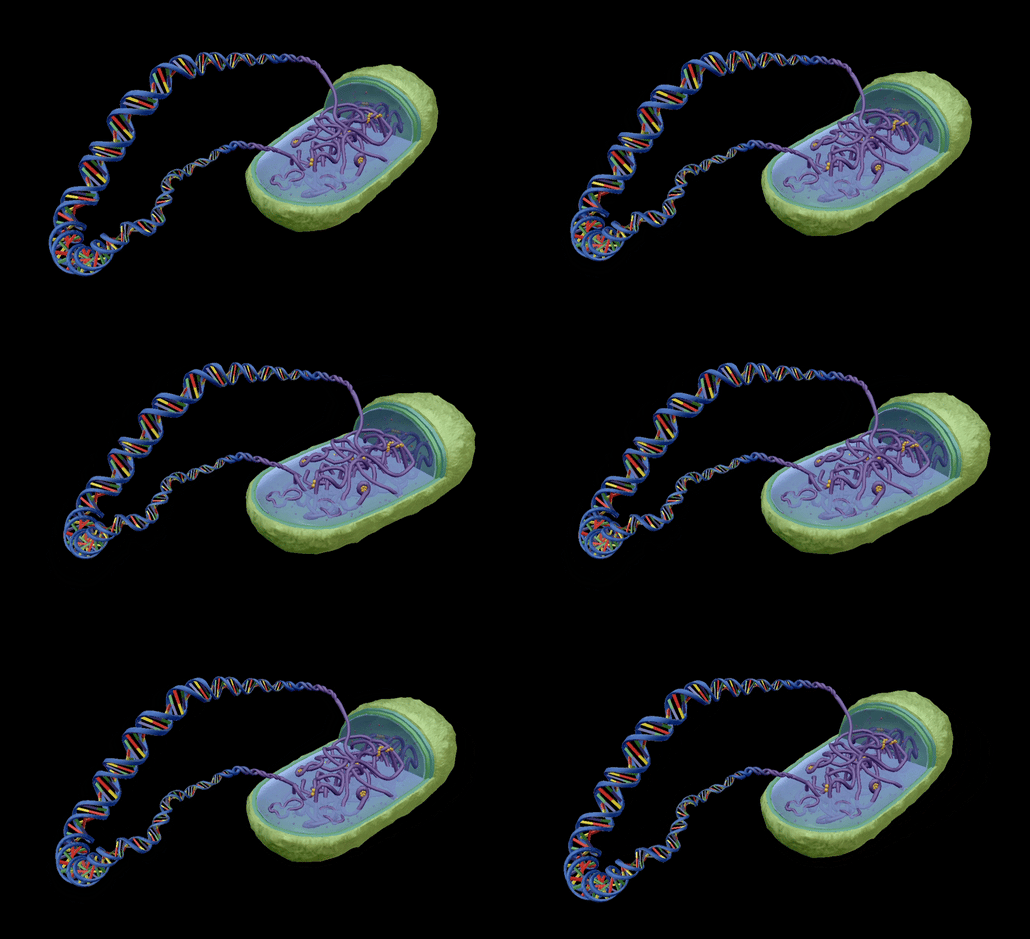
Students might notice that prokaryotic cells have a single, circular piece of DNA—prokaryotic cells have less DNA and do not use histones to coil DNA. Instead, DNA is supercoiled and compacted by nucleoid-associated proteins. Genetic material is located in the nucleoid, a region in the cell that, unlike the nucleus of a eukaryotic cell, is not surrounded by a membrane.

Prokaryotic DNA GIF from Visible Biology.
Here’s a handy table from the Visible Body Learn Site:
|
|
Eukaryotic Chromosome |
Prokaryotic Chromosome |
|
Shape |
Linear |
Circular |
|
Size |
Large |
Small |
|
Number |
Multiple |
Single |
|
Location |
Nucleus |
Nucleoid (region in cytoplasm) |
|
Storage proteins |
Histones |
Nucleoid-associated proteins |
Explain that these differences mean that when it comes time for DNA replication before cell division, there are some small variations in the process. These differences in process usually pertain to the size and complexity of the DNA.
Students will learn about these differences through tactile learning as they manipulate the models, and they will walk away with notes to study from.
3. Make a Flashcard Game Show
Flashcards are a popular study tool because they encourage students to actively retrieve information instead of just rereading their notes—but they can also be used to gamify your classroom!
Gamification refers to the process of, well, making a game out of classroom activities. If you’ve ever reviewed vocabulary with a game of bingo or quizzed students using Kahoot!, you’ve gamified your class. Games can be a great way to energize students and encourage collaboration, so here’s an example of how it can be incorporated using Flashcards.
First, students should have an understanding of the molecular structure of DNA. Through lecture or textbook reading, they should understand:
- DNA is made up of units called nucleotides, which are made of a sugar molecule (deoxyribose), a phosphate group, and a nitrogenous base.
- The sugar of one molecule joins with the phosphate group of another molecule through covalent bonding, forming the sugar-phosphate backbone.
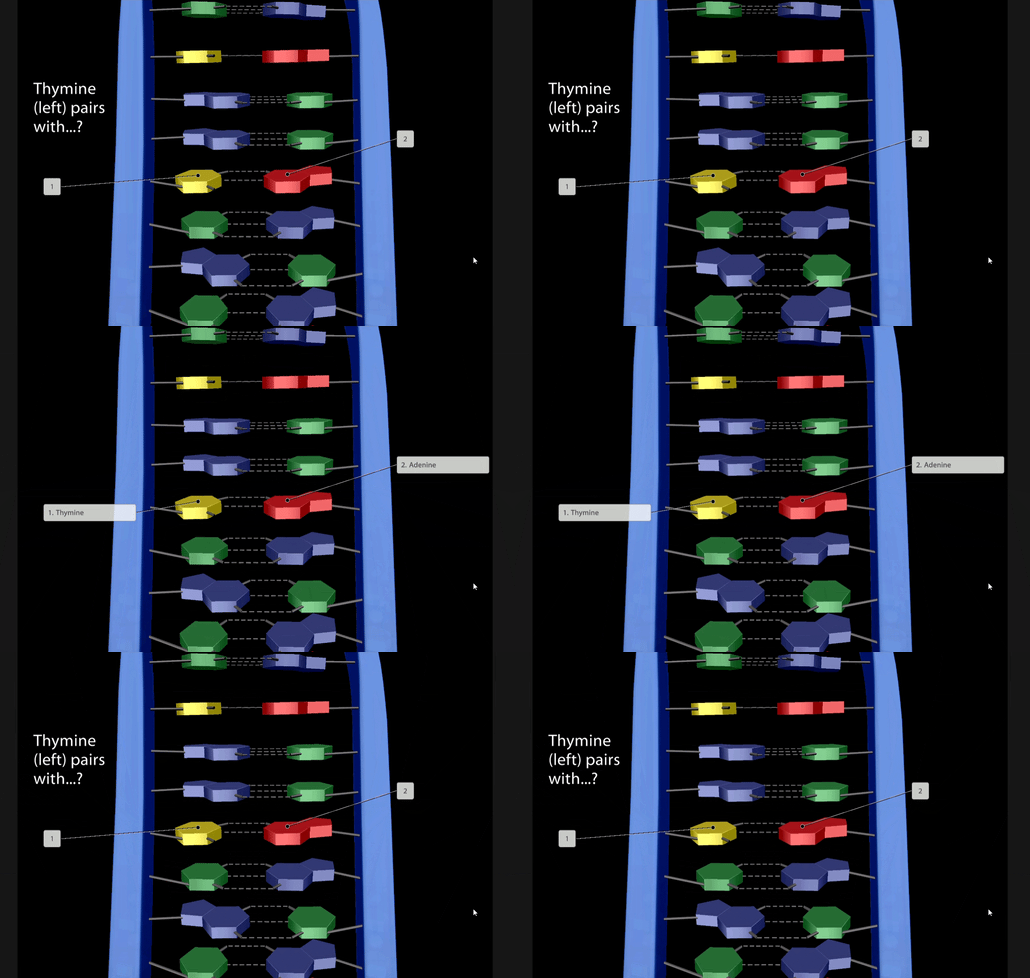
- The rungs of the DNA ladder are nitrogenous bases: cytosine, guanine, adenine, and thymine. Adenine pairs with thymine and cytosine pairs with guanine.
- The order and number of the base pairs code for specific proteins—these sequences are genes.
For this game, you can easily make your own Flashcard deck and write prompts using the text feature, or you can use our pre-made biology Flashcard decks, which ask students to identify different structures.

Flashcard GIF from Visible Biology.
Project the Flashcard deck so that all students can see clearly, and split your class into teams of 3-5. Ask each team to choose a leader to write down their answers on a small whiteboard or a piece of paper.
Show students the first side of the Flashcard and give them time to consult their notes, discuss, and form their answer. After they have written down their team’s answer, the leader should “buzz in” by raising their hand.
When all groups have answered the question, flip the flashcard by clicking on it and award points—a bonus point is awarded to the first group to get the answer correct.
This game can be used as a review to ensure students understand new concepts or as a refresher before moving on to other content. All Flashcard decks can be shared with a few easy clicks, so students can use the same decks at home as study materials.
4. Reinforce Lessons with Video
Did you know that Visible Biology has a YouTube series where Dr. Cindy Harley of Metropolitan State University unpacks biology content to help viewers tackle tricky concepts? This series includes visuals from the Visible Biology models students work with in the classroom, so when students use it to review information, it reinforces knowledge on a visual level as well.
You can use the flipped classroom model by having students view Lesson 1: The Structure of DNA as a homework assignment. This frees you up to answer questions and give students individual attention during class time.
In the classroom, send your students on a scavenger hunt on their laptops, phones, or tablets to find the structures Dr. Harley mentioned in the video.
Some ideas for scavenger hunt prompts:
- Find the sugar-phosphate backbone
- Find the three ingredients that make a nucleotide
- Find the nitrogenous bases that have one ring
- Find the base that binds with guanine
Ask your students to save their answers as saved views so they can check their work.
Here’s another way to use the Visible Biology YouTube series in your classroom: kick off a conversation about science history with Lesson 4: The Discovery of DNA’s Structure.
Here are three discussion questions to get students thinking:
- How did the outbreak of Spanish Flu in the 1920s influence the discovery of DNA structure?
- What’s the importance of Photo 51 (shown at 7:27)?
- Why is the Nobel Prize so important? What does it mean to exclude Martha Chase and Rosalind Franklin?
Next Steps
Make sure to follow the instructions at the beginning of the blog post and copy this premade content for your class!
Looking for more ways to use Visible Biology? Check out these resources:
- Biology lab manuals and activities
- Teaching Photosynthesis with Visible Biology: A Free Lesson Plan
- Free Lesson Plan: Diffusion and Osmosis with Visible Biology
For a free instructor trial of Visible Biology, contact our Education Team. Happy teaching!
Be sure to subscribe to the Visible Body Blog for more anatomy awesomeness!
Are you an instructor? We have award-winning 3D products and resources for your anatomy and physiology course! Learn more here.


